
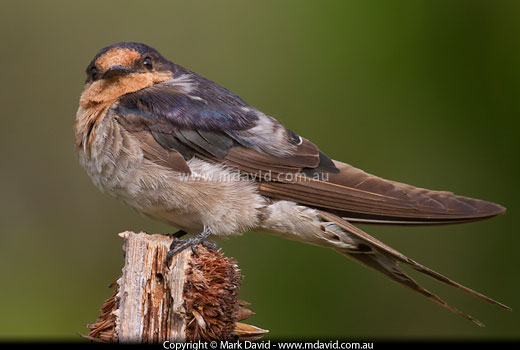
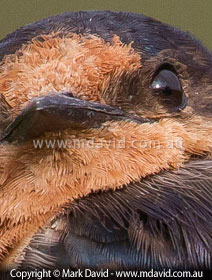
You don’t need to see every strand on every feather in a bird photo to make it a nice shot (see the sample detail from this photo in the image below). In fact I’d say other factors are much more important. But it’s nice to get things sharp when you want it. The bird is a Welcome Swallow.
This is the first thing people think of, but it’s usually not the culprit! Most camera gear these days works like it should. That’s not to say quality control is always perfect. I’ve experienced the frustrations of a camera that focused unreliably. In my case, the problems disappeared after a firmware update.
So I don’t want to suggest that equipment is never to blame. But in the vast majority of cases a soft photo is the result of one or more of the things I describe below.
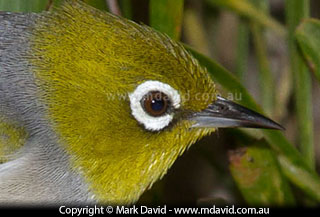
Fast-moving, tiny birds in weak light, like this Silvereye, don’t make it easy for photographers. Yet it’s even possible to consistently get tack-sharp photos of these guys. In this case, I used a strong flash, which put enough light into the scene to make everything easier.
In a perfect world our hands would be as steady as tripods, but they’re not. Which is why we invented tripods. An awful lot of soft shots — more than you might think — are the result of tiny amounts of camera shake, especially in things like macro photography or pictures taken with a long (telephoto) lens.
If you suspect camera shake then you have a few options:
Selecting a faster shutter speed is easy if you’re in shutter speed priority mode (called Time Value mode in some cameras). Just turn the dial to a faster speed.
If you’re in aperture priority mode though you have to be a little bit sneaky. What you do is select a faster ISO setting (a bigger ISO number). That forces your camera to auto-select a faster shutter speed in order to prevent things from being overexposed.
You can also flood more light into the scene to allow for faster shutter speeds. If your subject is close enough then your flash should do it.
Reducing the amount of movement in your camera is obviously your next option for cutting back on camera shake. Tripods (best option), monopods (next-best option) or standing really, really still and holding your breath while you shoot will improve your success rate.

Image stabilization allows for hand-held photography at slower shutter speeds.
If your lens has image stabilization (which is what Canon calls it. Nikon calls it vibration reduction and Sigma calls it optical stabilization) then that can be a great help if you’re working hand-held. But not when you’re using a tripod because in those circumstances image stabilization can confuse matters and make things worse. If your lens has image stabilization then the manual that came with it will explain more about how to use it than I ever could.
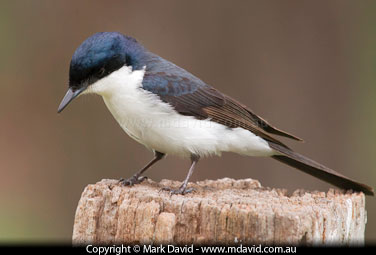
A long telephoto lens can bring you ‘closer’ to small wildlife like this Restless Flycatcher, but it also brings a need to be much more vigilant against camera shake.
The longer your telephoto lens, the more noticeable camera shake becomes.
So here’s a rough rule to keep in mind when you’re working hand-held: use your focal length number as a minimum shutter speed number. In other words, if you’re using a 200mm lens hand-held then 200th second should be your minimum shutter speed.
And finally, one last trick which sometimes works: take a fast burst of shots instead of just a single shot using your camera’s fast burst function. Because then maybe one of the shots will come out sharp.
Even if your camera was bolted to the side of mountain, that’s not going to stop motion blur if it’s your subject that’s doing the moving. For example, a car driving past at 60 kph will travel about 27cm during a 60th second exposure. That’s 27cm of motion blur. And some types of birds are forever jerking their heads backwards and forwards when they walk.
Once again, we have some options.
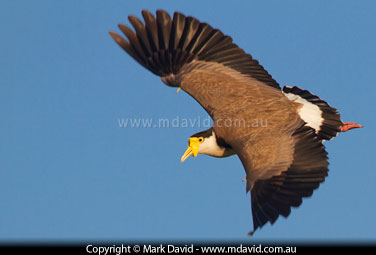
The shutter speed for this photo of a swooping Masked Lapwing was 800th second. I could have perhaps gone a bit faster but the light wasn’t all that strong. Also, I was happy to allow a little bit of motion blur around the wings to emphasise the sense of movement.
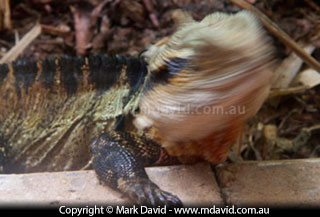
A Water Dragon turns its head. I admit this is an extreme example of this type of motion blur but I include it for two reasons — one: because head movements in animals result in an awful lot of blurred shots, and two: I thought it was funny.
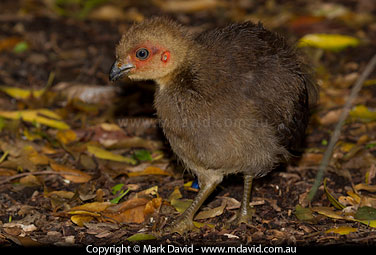
This Brush Turkey chick was constantly moving on the floor of a dark rainforest. Getting a sharp image without the use of a flash can be difficult under those circumstances.
Huh? Isn’t a fast shutter speed supposed to make things sharper? Not always. In low light a fast shutter speed can reduce image quality. You see, in low light, a shutter speed that is too fast is going to do two things:
So if you’re working in weak light then resist the urge to use extremely fast shutter speeds. And you should also think about locking your camera’s ISO at a setting no higher than what you know it can realistically handle.
In the previous section I talked about one of the difficulties of working in weak light. I’m talking about losing depth of field and noise getting into your photos.
Seriously, you’d be surprised how often I see photos taken in weak light that turn out soft, which is why I’m making a big deal about the subject here.
If you know that weak light is your problem then you’re just going to have to find a way to get more light into your lens. That might mean using a flash powerful enough to reach your telephoto’s subject, or it might mean mounting your camera on a tripod and using a slower exposure (and hope your subject doesn’t move too quickly for your slow shutter speed).
Modern digital SLR cameras these days make it easier to work in weak light because they can reach into some high ISO settings, allowing for photography in conditions that were once considered too difficult. So feel free to use a higher ISO. That will allow you to work with a shutter speed fast enough to reduce or even prevent motion blur. But you really should be aware that one of the prices you can pay for using the highest possible ISO for your camera can be an increased amount of noise in your photo.
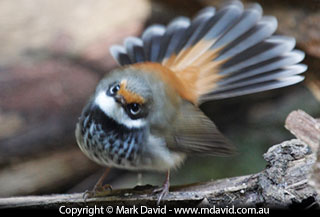

These photos of Rufous Fantails were taken in dim light without a flash, and then with a flash. The one without the flash forced the camera to slow the shutter speed down to 1/32 second. Not nearly fast enough for such a fast-moving bird, and not fast enough for working hand-held with the 400mm lens I was using either. The photo taken with a flash was taken at 250th second. Both shots were taken in the same place with the same lens.
I once heard it said that there were two types of tripods: the ones that are easy to carry, and the good ones.
A cheap, lightweight tripod will allow even the slightest breeze to wobble your camera enough to get camera-shake blur. So if you’re buying a tripod, consider getting a good one. Think of it as an investment because our tripods tend to last much longer than our cameras.
Here’s something you might not have realised: as you gradually extend the legs of your tripod you should always use the top extensions first. Because the top extensions are thicker than the lower ones. Thicker legs means a more stable tripod. Ideally, the lower, thinner, leg extensions should only be used in calm conditions. So if it’s windy, then think about not extending your tripod all the way.
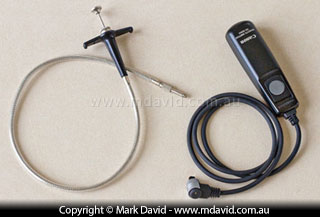
Old (left) and modern (right) versions of a cable release.
Even if you’re using a good, solid tripod, you can still get camera shake from the way you press your shutter button. Even a careful squeeze of your shutter button can be enough to cause the kind of camera movement that’s noticeable if you’re using a long lens or doing macro photography.
So if you really need to keep the camera still and you’re using a tripod, then you should think about also using a cable release.
A cable release is a cord with a button on the end. You connect one end to your camera and the other end with the button goes in your hand. When you press the button, the vibrations don’t make it all the way down the cable and so the camera doesn’t shake.
If you don’t have a cable release, then think about using a delayed exposure. For example, if your camera fires 10 seconds after you pressed the shutter button, then it would have had plenty of time to stop vibrating.
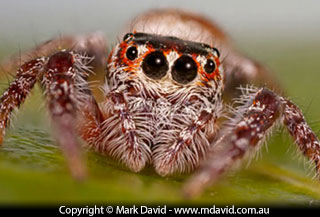
Depth of field, or perhaps I should say, not enough depth of field, can be a big problem when photographing very small creatures. I wanted the entire face of this jumping spider to be in focus, so I took a series of shots focusing at different depths and merged them all into the one shot in a process called stacking.
Depth of field is the amount of distance between the closest and most far-away things in focus. If you don’t have enough depth of field then you won’t be able to get enough of your subject in focus.
You control depth of field with your aperture setting. If you choose a smaller aperture (bigger f-number) then your depth of field will increase. When photographing people or wildlife at a distance then about f/8 is usually sufficient to get enough of the subject looking sharp. f/11 will make even more of the subject in focus.
But don’t push that aperture too far. Really small apertures, like f/32 for example, cause problems of their own. Also, as a general rule, depth of field issues will not be so noticeable at shorter focal lengths.
Another trick you can use is to take two or more photos of the same scene, focused at different distances. Then merge all the sharpest bits from the shots together on your computer later. That process is called stacking.
I talk more about what depth of field is on this page and how to manage depth of field on this one.
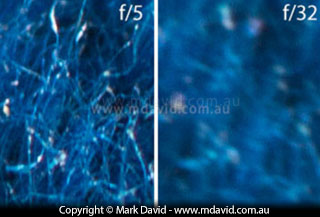
100% crops of the same photo taken at f/5 and f/32.
Even though some of my lenses allow me to choose apertures as tiny as f/32, I don’t like using anything smaller than f/16. And even that setting is something I only use when I really need a heap of depth of field.
You see, at those really small apertures (big f-numbers), some unpleasant physics start happening with the way light works. To cut a long story short: tiny apertures cause diffraction, and that can make the entire image go a little bit fuzzy.
So try not to go beyond about f/16. Or better still, if you’re trying to get reasonable amounts of depth of field then f/8 to f/11 is probably a safer range of apertures to use.
If you can’t narrow down any one cause for soft photos then quite often it might be a combination of things happening. This is especially likely in weak light, when high ISO, low depth of field and slow shutter speeds (which increase motion blur and camera- shake blur) all combine to produce a soft photo.
Think about every setting that went into taking your soft shot and ask yourself if each one was an ideal setting for that situation. For example, was the shutter speed close to being too slow for working hand-held, and was the ISO getting a little bit too high? Chances are, you might be dealing with a bunch of borderline settings that might not have been so bad by themselves but add up when used together. If conditions require that you use a bunch of borderline settings then it could be a sign you need to change the conditions. That might involve things like getting more light into the scene with a sufficiently powerful flash.
Copyright © Mark David. All rights reserved | Mark David on Google+


