
If the light is awful for other types of photography, you can often still do macro. That’s because the rich colours stripped out of midday light are restored by the flash.
And macro subjects are all around you.
You don’t need to spend a lot on equipment if you want to do macro photography. Some people get decent results simply by fitting a converter over the top of their existing lens, or using extension tubes on their lenses. I haven’t personally tried either of those setups so you’ll need to do your own inquiries there.
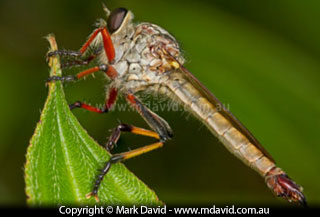
The harsh midday lighting didn’t stop me getting good colour into this photo of a Robber Fly.
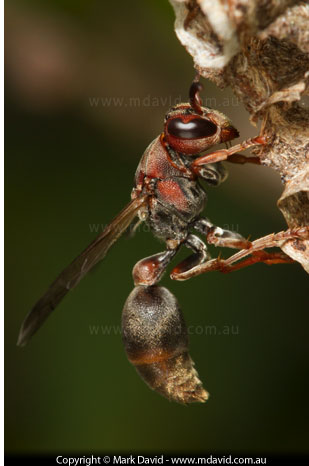
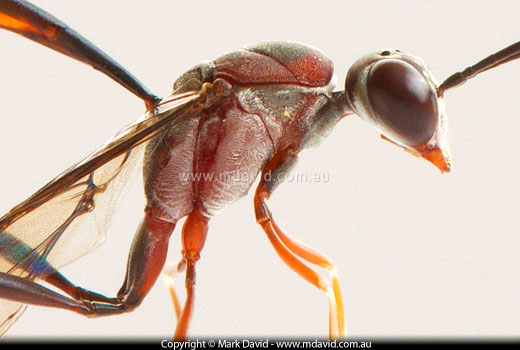
When taking macro shots, remember that some subjects are capable of biting or stinging, like this paper wasp.
I use a 100 mm macro lens. It’s a fast lens (capable of f/2.8) and it can focus from inches away all the way out to infinity. That combination of 100 mm and big aperture makes it a wonderful portrait lens for photographing people but I won’t dwell too much on that subject here. If I was going to start all over again I’d probably go for a longer focal length — perhaps 180mm. That’s because the longer focal lengths provide some big advantages: you don’t need to get as close to the bug to fill the screen with its image, because the 180 is more telephoto than the 100. That’s great if the bugs are easily spooked whenever you try to get in close. And because the 180 is more telephoto, it gives you softer and less distracting backgrounds.
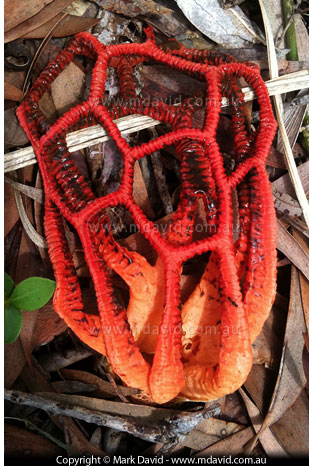
You don’t need fancy, expensive equipment to do macro photography. I took this shot of fungus with the camera in my mobile phone.
You don’t need a tripod to do good macro, although I suppose you could argue that you need a tripod to do great macro. I’ll explain more about that in the second section. With a bit of technique you can get great results working hand-held and so that’s how we’ll start here.
If you’ve taken macro photos with compact cameras then you’ve probably got the macro bug already (yes folks, there’s a pun in there). Compact cameras have smaller sensors than digital SLRs and that can tie them to the kind of smaller apertures that help with getting depth of field. But an SLR can match the compacts for depth of field if you use the right settings.
If you’re working hand-held, then chances are you’ll need a flash. I now use a special macro flash with my macro work, but that’s not essential. You’d be surprised at how good your results can be with the pop-up built-in flash that a lot of digital SLRs have. That’s because you don’t need a lot of flash power to illuminate something that is only inches away from the camera. The only problem with a pop-up flash is that, because it’s so close to the lens, a lot of the light will bounce off your bug and come straight back into the lens, giving you some shiny highlights.
Because insects and spiders are cold-blooded, they move more slowly in the coldest parts of the day. That offers an enormous advantage to macro photographers. If you’ve ever tried to focus a lens on a hyper-active ant heated up by the midday sun you’ll know what I mean. First thing in the morning, insects and spiders will be quite docile and therefore make the most cooperative photographic subjects. You might also find the most beautiful light at sunrise too.
As your subjects get smaller and as you move in closer, the depth of field in a photo diminishes. In fact, depth of field can be a major headache when you’re photographing very tiny critters from a very short distance. For example, you might find you’re only getting a part of one ant’s eye in focus, with the rest of the ant coming out horribly blurred. So now I’ll tell you how to stop that happening.
We’re going to be taking control of our aperture and our shutter speed. That means switching your camera over to manual mode.
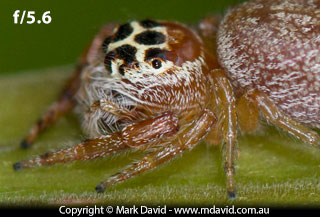
In the first photo, an aperture of f/5.6 created a shallow depth of field that pushed the distant side of the spider’s head far out of focus.
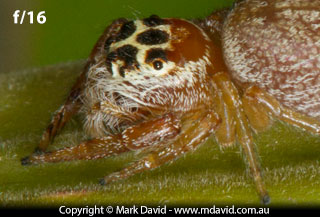
I’m going to assume here that you’re not taking stacked shots. In my beginners’ article on digital SLR photography I talked about how aperture affects depth of field. Because depth of field is such an elusive and difficult thing to achieve in macro work, then you’re going to have to choose a small aperture. Let’s start at f/16.
f/16 will give you enough depth of field to get most of your typical bug in focus.
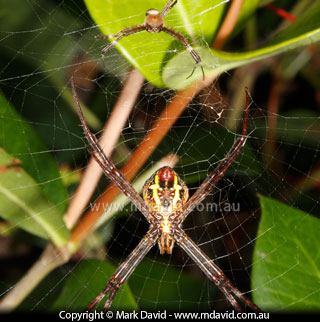
When taking shots of critters, it’s generally considered good practice to get the eyes in focus.
Sure, f/32 will get you even more depth of field, but you might find that it wasn’t worth it. That’s because diffraction becomes a big problem at any aperture smaller than f/16. In fact, f/16 is pushing it too, but we’ll stick with f/16 for now. To sum up, once you start using smaller apertures (bigger f-numbers) than f/16 your images will start looking blurry.
We’re using the flash, and the next step is to set your shutter speed at your camera’s maximum flash sync speed. Huh? Flash sync speed is the fastest shutter speed your camera can manage firing the flash while the shutter is fully open. A lot of cameras now have a flash sync speed of 1/250th second. If that’s the case with your camera then set your shutter speed to 250th second. If your maximum flash sync speed is 200th second then set your shutter speed at that. Your camera’s manual will tell you what your camera’s maximum flash sync speed is.
The reason why you want to go for the fastest speed your flash can sync with is because you want to eliminate camera shake blur. You’d be surprised how even a tiny amount of camera shake can affect macro photography.
Now you’re probably thinking, but hey, doesn’t the flash freeze the action for you? Well it does, but if your shutter is open for too much longer than the flash is firing then your sensor will still most likely record some blur. You see, the thing to remember is that camera shake blur is extra noticeable in macro work. Also, since bugs are often moving too, you’ll need a short exposure time to freeze their motion too.
Manual mode, f/16. 250th second (or whatever your flash sync speed was). Flash ready.

Depth of field gets smaller as you focus closer.
If you look at the diagram above, you’ll see a problem for bug shooters. The blue box is the area within which objects will be in sharp focus. That box gets thinner as you focus closer to the camera. In other words, you’ll only have a very small depth of field.
When you think about how that applies to macro you’ll realise you it’s going get tricky getting a whole bug in focus. In the examples above you’ll see that most of the butterfly will look fuzzy.
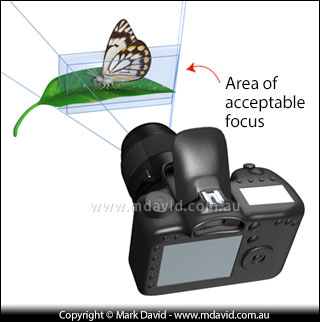
Thankfully, a solution is pretty easy. If you just swing your camera around to the side (picture at right) then suddenly all of a flat object like a butterfly fits neatly inside that shallow depth of field. That’s what I did in the butterfly photo at the top of the next page. It ensured that the entire wing as well as the body were in sharp focus. It’s no coincidence that so many macro shots are taken from the side!
Now, I want to stress here that I’m not trying to tell you to take every macro shot from the side of your subject. That would be boring and it’s better if you decide, not me, about where and how to take your shot. Just remember that you have that easy trick available.
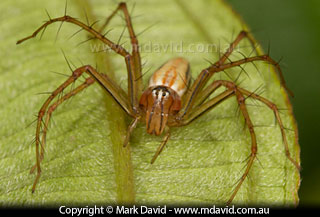
The spiders are in focus, but that background is way too much of a distraction for my liking.
So now you’ve got the whole critter in focus. You hold your breath to minimise your movement, and take your shot. I hope you didn’t jab the shutter button because that would have made the camera shake a little. No, a smart photographer like you would have squeezed the shutter button, or rolled your finger onto it.
So then, how did it turn out?
Chances are, there is a lot of stuff confusing your picture in the background. If it’s not then well done! But for the rest of you, that background stuff is out of focus, but still competes with the bug for attention. This is where you need to get sneaky.
Copyright © Mark David. All rights reserved


