
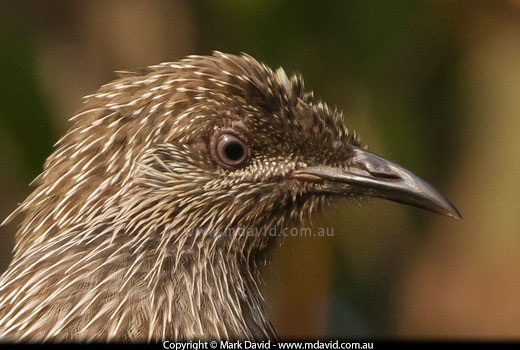
This photo of a Little Wattlebird needed no editing work at all to get these warm colours. It just came out of the camera like this, thanks to the beautiful golden light at the time I took the shot. That’s obviously the ideal way to work, but sometimes we need to tweak our shots a little bit in order to bring out their potential.
I often see people asking how to use their image editor to turn their photos into something really special. Sometimes it’s easy to make suggestions. Other times it’s quite difficult or even impossible.
I believe that the more work you have to do after the photo was taken, the less likely you’re going to end up with a great result. Ideally, all the effects you want should have been thought about, and captured, when you took the photo. Because it is so much easier to photograph something from a good angle that, for example, doesn’t have an ugly sign in the background, rather than try to remove that sign later on in your computer.
If you’re taking photos in beautiful light the camera will record it and deliver a photo that probably won’t need any work at all. But if the lighting is bad, then it can be madly difficult even for the experts to make it look good.
But then I don’t want to come across as some type of purist about image editors either. There are people online who preach that no adjustments should ever be necessary if you know how to drive a camera, and they usually go on to name famous old photographers who did stunning work in the days before computers.
What those purists conveniently forget to say is that, most of those brilliant earlier photographers probably spent hours in the darkroom doing pretty much the same kind of tweaking which is now done by the software.
So having said all that, here are a few image-editing tricks you can use which aren’t difficult but will help to bring a bit more out of your photos. This guide is not at all comprehensive — there are plenty more tricks you can pick up later. But if you’re looking at a way to start then read on.
I describe the steps in the order that I would normally perform them. Usually an image won’t require all of these steps, and sometimes it requires more.
If you work in Camera Raw mode, there’s a lot of stuff you can do after the shot. You see, when you shoot JPG, your camera locks in a lot of stuff that Raw would have allowed you adjust later. If you know your camera gear very well you can set it up to create your JPGs the way you want, but because a lot of things can change while I’m out taking photos, I prefer to do all my work in Raw mode. It gives me flexibility. Perhaps better still, all the stuff described on this page can probably be done in the Camera Raw editing software that comes with lots of digital SLRs.
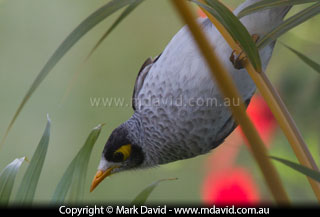
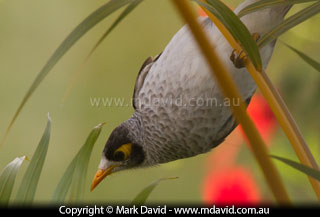
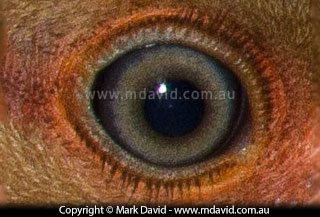
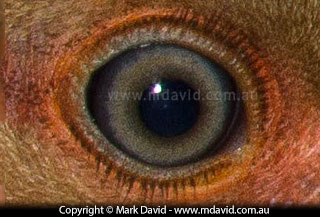
I only had one chance to get this shot, and that was while looking into the shade through a thick glass door. The result was a bluish tinge to the photo. Here I show the before and after versions of the white balance adjustment — nothing more difficult than dragging a slider. It’s highly subjective about how far to take this. In fact, some people might prefer the ‘before’ version.
First thing I always check is the white balance. Objects in shadows, even when photographed in the best times of the day, can have a strong blue cast over them. Sometimes that’s what you want. Often it’s not. Wildlife and human skin tones can look quite sick when they look blue. So if your subject is tinted blue from shadows then try adjusting the white balance. It can be called White Balance, or WB, or colour temperature, or Temp or whatever. It’s all the same thing, and you’ll usually be offered a slider to increase or decrease the colour temperature. Drag it all the way one way and it will look horribly yellow. All the other way and it will look horribly blue. Try dragging the colour slider until greens look like proper greens and skin tones and animal fur colours look the way they should. I can’t tell you how much to do it. Just drag the slider until it looks right.
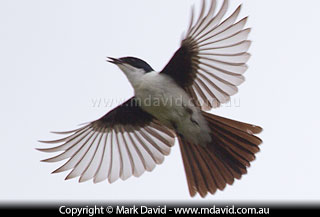
Adjusting the exposure is another example of just pulling a lever in your Raw image editor. However if you can get the exposure right at the time of taking the photo then you will get much better results.
Next step is exposure. Now, this is one thing which should really be done right when you take the photo, but working in Raw mode will allow you to make some adjustment on your computer without too much loss of quality.
So if the exposure is wrong, try adjusting it using the Exposure slider. Note that big adjustments to exposure are likely to cause a degradation in image quality, so be careful not to over-use this feature.
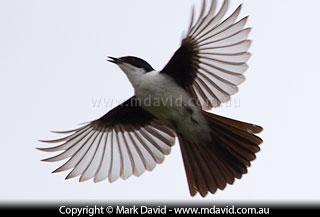
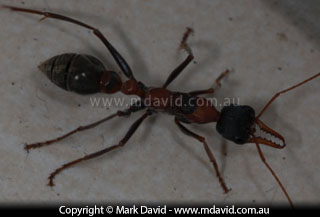
Adjusting the fill light can take some of the harshness out of shadows. This bird, by the way, is a Restless Flycatcher.
Sometimes, like when taking photos on a cloudless day, shadows can be extremely dark and harsh. If you have the option to adjust something called Fill light, or shadows and highlights, or whatever your software calls it, then this is a great next step. Once again, be careful about making big adjustments because sometimes a photo can look horribly fake and washed out if you go too far.
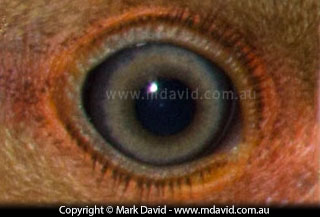
Sharpening in the Raw editor can enhance the look of your photos but if you sharpen it too much you will end up with image degrading. In this example, I’m zooming into the image at full (100%) resolution. It shows that the sharpening made the noise worse, but I was able to fix that in the next step.
Working in Raw mode will often allow you adjust the sharpness of an image. Now, if your photo was badly focused then there’s not much you can do. But adjusting the sharpness can give a shot a bit of extra spark. Like with the other steps mentioned so far, keep in mind that it’s also easy to overdo the sharpening.

Before and after a reduction of Luminance Noise
When I talk about noise I’m talking about the speckling of images with incorrectly-tinted pixels. I talk more about the problems and causes of noise in your photos in this article. If you work in Raw mode then chances are that you can reduce image noise with the software. To adjust the problem of light and dark speckling throughout the image, you adjust the Luminance noise levels. The colour noise is just what it sounds like it is. I often make a small reduction in Luminance noise but find that fixing colour noise is usually not necessary. You might find differently. Once agin, go easy with those sliders because if you reduce noise by too much you will start losing detail and your images will take on a kind of fake look about them.
I’ll stress again, that if you avoid all the potential problems at the time that you’re taking the photos then not only will that save you from a lot of boring computer work afterwards, but you will probably also end up with much better photos too! In fact, the best photographers are always thinking about their shots before taking them, instead of just firing away. They know the advantages of foresight.
But since we don’t always get the chance to get everything perfect at the time of the photo, especially with some of the more elusive kinds of wildlife, then these few adjustments can often give your shots that little extra bit of sparkle.
Copyright © Mark David. All rights reserved


