
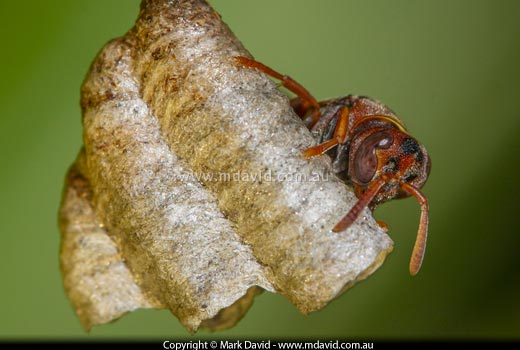
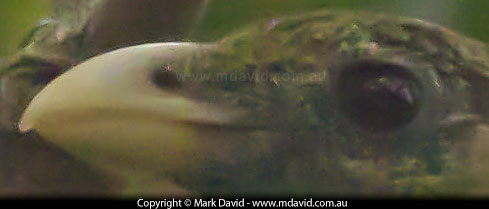
With the right settings your photos can be almost noise-free. The critter is a paper wasp.
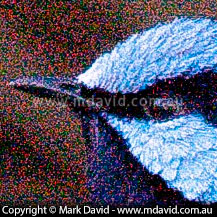
In photography, noise is the speckling of incorrectly-tinted pixels throughout an image. It’s not something you normally see until you start zooming right in to the picture on a computer screen. But taken to extreme, noise (and efforts to remove it) can play havoc with an image. The photo of the bird’s head shown a couple of paragraphs below is an example.
Only if it bothers you during the ‘normal’ ways of looking at a picture. You see, most photos will have some amount of noise, but if you print your picture out and you’re happy with it, or you think it looks good when viewed in a normal way on your screen, then it’s not worth worrying about. But if it still bothers you under those circumstances then you might want to keep reading.
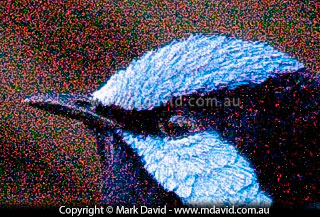
With the wrong settings you can get a picture badly speckled with noise, like this one of a Superb Fairy-wren.
These days, it’s just too easy to zoom right into an image on a screen, filling your monitor with just a small part of the image until you can easily see the individual photo pixels. When you do that, it’s possible to see the tiniest imperfections, including noise.
But when you think about it, filling a monitor with only a small part of an image is not the best way to appreciate a photo. It’s like going over one blade of grass at a time with a microscope to see if you like a garden.
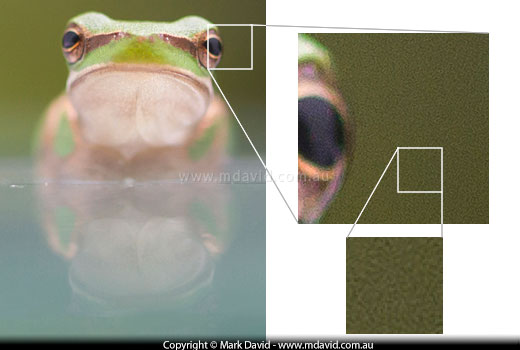
This photo of an Eastern Dwarf Tree Frog has some noise which is mainly visible in the darker parts of the background, but I’m not bothered by it. Most, if not all digital photos, will have some amount of noise.
The surface of a camera’s sensor — the thing taking the place of film — is made up of millions of tiny sensor pixels. Each one of those pixels is crazy-small, and the tinier they get, the less surface area each one has to capture samples of light. Smaller samples of light mean less information to work with, and that results in mistakes. So some of the pixels might register the wrong colour (colour noise), or the wrong light/dark amount (luminance noise).
You’ll find that, as the amount of light diminishes, like in the shadows, the amount of noise increases. Which makes sense when you think about it, because if there’s less light around, there’ll be fewer photons landing on those already-struggling sensor pixels.
At this point though, I think it’s also fair to point out that different sensors (different brands and new versus old) and different processors (the “brains” inside cameras that process the data) have different success rates in avoiding noise, but it’s still fair to say that the bigger the pixels are in a sensor, the more of an advantage they have over smaller ones, if all other things are equal.
I talk a whole lot more, including a mention about why monster megapixel counts in digital cameras can contribute to noise, in this article about megapixel counts. But to sum up the relevant bit here: the more pixels you squeeze into a camera’s sensor, the tinier they’ll have to be to fit in. And as we now know, the smaller they are, the bigger the chance that they will make mistakes. Sometimes giant megapixel counts are not such a good thing.
Increasing your camera’s ISO setting has a similar effect to using faster film in a film camera. It allows you to work with faster shutter speeds or smaller apertures in the same amount of light. The problem with that is, if you increase your ISO settings too much then you also increase the noise.
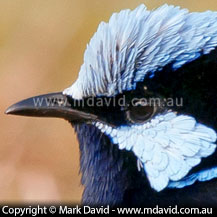
You can use software to clean up the noise in your photos. Programs like Adobe Lightroom allow you to view your Camera Raw files and drag sliders to get the amount of clean-up you want, and providing that the noise levels weren’t too bad to start with then you can end up with some great results. But there are limits to what even the best software can do. In the photo below I’m starting out with some really bad noise levels. See how, in the next version, the software fixed the noise, but the resulting image still ended up looking pretty bad. That’s why you’re better off avoiding noise in the first place.
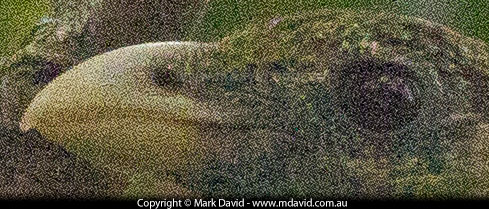
You can use software to fix noise, like I did with this picture of a Green Catbird, but if the noise levels are as extreme as this then you will still end up with poor image quality.
Here are some things you can do to reduce noise:
When the bird was in better (stronger) light, the noise problems went away.
If you reduce the resolution (image size) of your image then you will be throwing away a lot of pixel information. While that can sound bad, it can actually work to your advantage. Because when your image editing software throws away those unused pixels, it has to average out the tonal values of the ones it has left. This can result in the noise in your images diminishing. You might not always have the option of shrinking your image sizes down for print, but for web work and email, small is actually better!
Copyright © Mark David. All rights reserved | Mark David on Google+


