
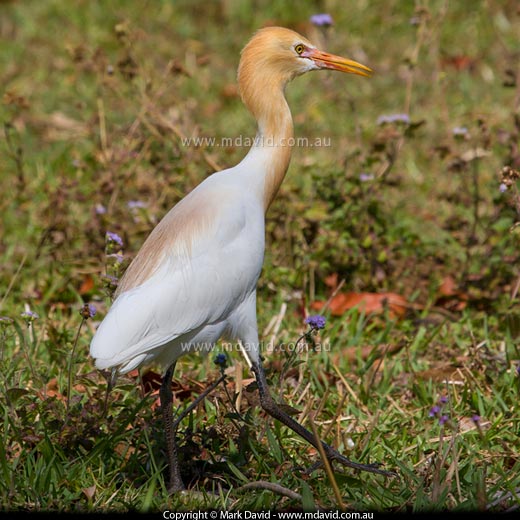
Exposure compensation allowed me to avoid the white plumage being blown-out (badly overexposed) in this photo of a Cattle Egret.
Sometimes your camera will take shots that are too light or too dark. For example, there might be a bright sky in the background behind your picture of a dog, confusing the camera’s ability to judge the correct exposure and you end up with a photo with the dog looking too dark.
Or perhaps a black cat on a black rug causes the camera to do the opposite. It sees all those dark tones, assumes it’s a dimly-lit scene needing lots and lots of exposure, and makes things too bright.
There are plenty of other things that can confuse your camera. Rather than waste your time trying to describe them all, I’ll just let you know how to fix the problem.
Exposure compensation is the setting that tells your camera to make things lighter or darker than what it thinks it should do. A positive amount of exposure compensation will make your camera increase the exposure (make everything brighter). And of course a negative setting will make everything darker.
This is one of those things where different cameras do it differently, so rather than make you read eight million boring words about every way of doing it for every conceivable type of camera (which I don’t even know), you’re going to have to look it up in the manual that came with your camera. Because exposure compensation is so important, then there’s a good chance it will be something pretty easy.
From now on, I’ll mention a few typical examples of when exposure compensation saves the day.
My most common use of exposure compensation is when I’m trying to avoid blown-out highlights. What I mean is, avoiding those ugly blobs of white highlights in a scene that are so awfully overexposed that they fail to capture any detail at all in them. This is likely to happen if the light in a scene is so strong that the camera can’t capture the full range of tones — from light to dark — in a single exposure. And I talk more about exactly that problem in my article on dynamic range.
If the blown-out highlights are bad, then using about minus 1 stop of exposure compensation will usually fix those highlights. Of course it will make the rest of the photo darker too, but there are ways of fixing that up using software.
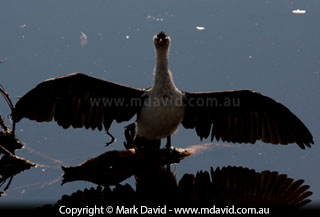
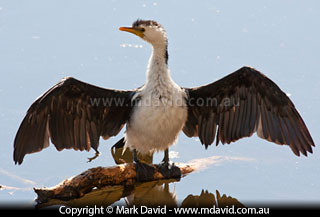
In the first shot, a whole lof glare and sunlight bouncing off the water and shining right into lens confused the camera and made it underexpose everything. In the second photo I used +2 stops of exposure compensation to brighten everything back up.
This is bound to confuse your camera and make your foreground subjects underexposed. The picture of the Little Pied Cormorant above is an example. When I took that shot, the sun was reflecting off the water behind the bird and straight into the lens, so it was seriously crazy bright, which made the camera darken everything back down again. The result of that was that the water looked okay but the cormorant ended up almost black. In this case, plus 2 stops of exposure compensation brightened everything up, and allowed me to see the bird properly.
Once again, I could bore you with the theory, but the easiest way to learn is to just take a test shot and see how it turns out. If the test shot is too light, then experiment with some negative exposure compensation settings. And if it’s too dark, then try some positive settings (to make the photos turn out brighter). You’ll quickly get the hang of it and your preview image on the little screen on the back of your camera will let you know if your adjustments are making things better or worse. In other words, it will tell you if you made the right choice in going negative or positive in your exposure compensation.
Your histogram or your flashing highlight alert (described at the end of the article on histograms) will also let you know if your test shots have been incorrect.
So now you don’t have to be bothered if your camera is struggling with its exposure settings. It should handle things pretty well most of the time, but you don’t have to settle for second-best the rest of the time.
Copyright © Mark David. All rights reserved


