
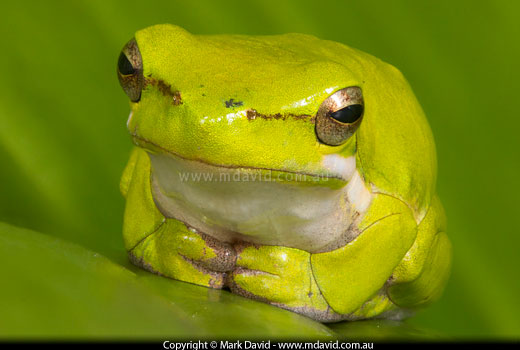
Getting this entire Eastern Dwarf Tree Frog in focus was made possible using the process called stacking.
Stacking images in photography is the process of taking a series of photos, focused at different points along the subject, and then using software to merge all the sharpest bits of each shot into the one ideal image. That used to be an awfully laborious and time-consuming process when you did it manually (believe me, I’ve tried it!) but modern software can do it in seconds.
This tutorial was done in Adobe Photoshop CS5 Extended. Chances are that similar versions of Photoshop will do this stuff in pretty much the same way. But that’s not the only software to automate the stacking of your photos. There are specialised packages, like for example Helicon Focus, (Mac or PC), which allow you to do the same thing for a much lower price.
Each of the different software packages will have different workflows, but the principles are the same — they merge all the sharp parts of a series of photos into one, super-sharp image.
I don’t want to suggest that it’s essential to have a focusing rail to do stacked macro shots. The truth is I do a lot of stacked shots working hand-held, including the example here of the frog. But with super-tiny subjects requiring the most precision, you'll find that a stacking rail on a steady tripod will make your life a lot easier.
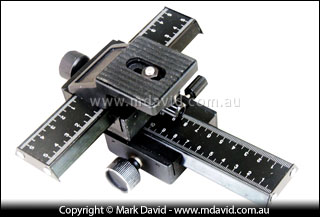
My trusty old focusing rail. This device sits between the camera and the tripod. Turning one wheel allows me to move the camera closer to the subject in tiny, controlled increments. Turning the other wheel makes precise sideways adjustments.
The focusing rail sits between your camera and a tripod. It allows you to turn a dial in small increments, in between shots, which moves your camera ever so slightly forwards each time. That’s ideal for focusing further and further into your shot.
If you use autofocus then your camera is going to want to keep focusing on the same part of your subject as move in closer. And that’s the last thing we want. So turn off autofocus on your lens.
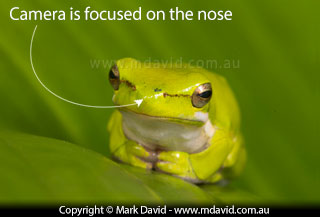
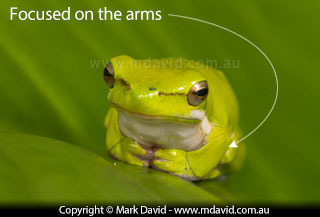
Take your first shot focusing on the closest part of the creature. In the case of the frog shot it was its nose.
Then for the next shot, you want to be focused on a part of the scene that’s a little bit further away. In the case of the frog picture here, I just moved the camera a tiny bit closer to it, partly because if I’d swung my hand around to the turn the focusing ring my movement would have frightened the frog away. But if you’re doing this trick with really big things, like landscapes, then it’s perfectly okay to just keep your camera still and adjust your focus instead. The important thing is that you are focusing on a different point. There’s nothing really tricky about it — you just want a different part of the scene to be in focus.
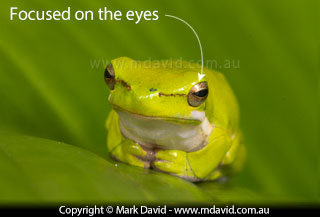
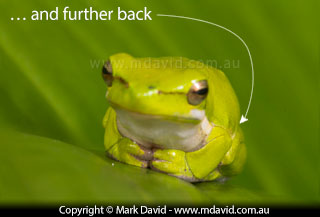
So in the next shot in my frog photo example below I got the eyes in sharp focus. This is where a focusing rail can make things easier because of all the precision it gives you. In series of shots like this one I always like to have at least one of the shots with the eyes in focus because I think eyes are so important in wildlife photography.

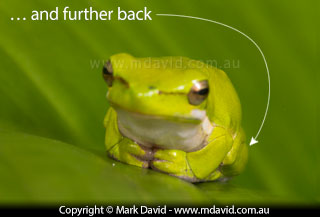
The idea is that you keep taking more shots, with each one focused slightly further into the scene until you end up with a series like the frog pics shown below. And here’s a suggestion: if you take more than one series of photos, try taking a shot of your thumb or some other thing in between each series so you have a clear division between each series of shots. Otherwise you could end up being confused about which files go into which series.
You can see how if you combine the sharp bits of all of them you’ve got enough to do the whole frog. If your files need any colour correction, sharpening or any other effect then try to apply the same effects to each of them. Because you want them all to look pretty much the same.
I’m going to be working in Adobe Photoshop from this point on. So if you were working in RAW up until this point then now’s a good time to export your files into something Photoshop can open, like TIF or JPG.

Launch Photoshop, but you don’t want to open any of your files yet. That’s because you’ll be loading your photos into the software using a sneaky better way.
So, with no files open, go to Photoshop’s File menu and select Scripts > Load Files into Stack…
That will bring up the Dialogue Box shown above. Click on the Browse button, to navigate to the folder where you’re storing your files.
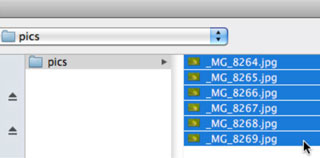
Click on the first of your files in the list, and then Shift-click on the last file to select all of them. And then click Open.
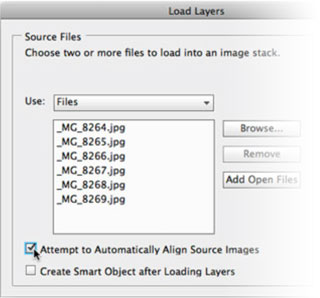
That’s going to take you back to your original dialogue box, except this time your files will show up inside it. Click on the option to Attempt to Automatically Align Source Images. Then click OK.
Photoshop then does a really cool thing which would never have happened if you had opened the files the normal way. What it does is, look inside the EXIF data written inside each file to determine what kind of lens was used to take the photos. Then it compares that with its database of all the lenses it knows about. If it knows your lens, then it will remove the subtle kinds of distortion known to be created by that particular model of lens, to ensure that your layers align themselves better.
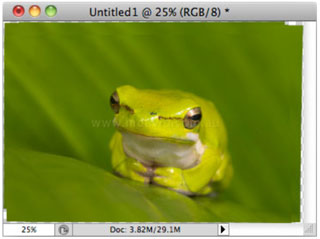
The files open up into a document with multiple layers, with each layer aligned correctly over the others.
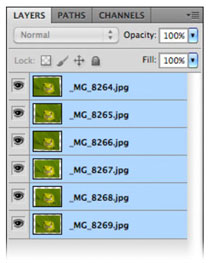
Go to your Layers palette, and shift-click to select all of the layers at once. Then go to the Edit menu and select Auto-Blend Layers…

Select the option to Stack Images and also select the option for Seamless Tones and Colors.
Then click OK.
Photoshop thinks really hard for a while, as it does the kind of work that we used to spend half a day doing. The software completes the task in seconds, and does a better job too. It creates masks for each of the layers, hiding the blurred stuff and retaining the sharp stuff.
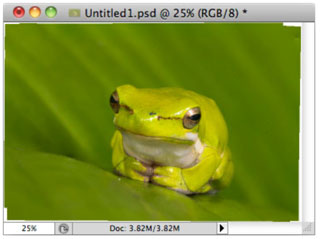
Go to the Layer menu and select Flatten Image.
You might then need to crop the image slightly, to remove the ugly overlaps visible around the edges, but apart from that, you should now have the kind of depth of field in your image that we previously could only dream about.
Copyright © Mark David. All rights reserved | Mark David on Google+


