
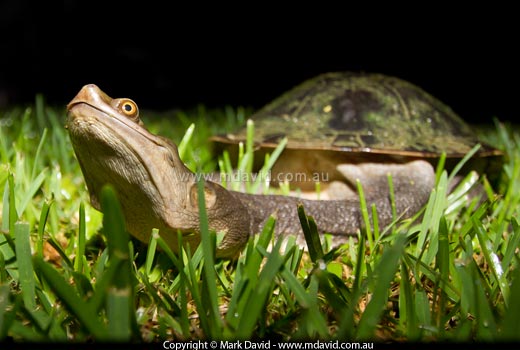
This photo of a freshwater turtle was taken in almost complete darkness.
There’s a whole different world out there at night. For example, lots of critters only come out when it’s dark and it just seems wrong to miss out on the fun of photographing them. I’ve been stumbling around in the dark with my camera countless times and have fallen into some reliable routines.
Easier said than done. A camera’s autofocus needs light to function, and so do us humans when we focus our cameras manually. It can be frustrating watching your camera’s autofocus hunting endlessly backwards and forwards in the weak light.
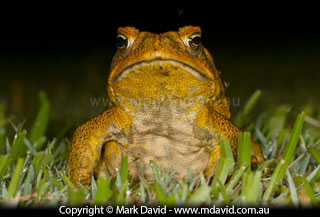
Some creatures, like this Cane Toad, only come out at night.
Ideally your flash, if it’s a good one, will have a lamp in it for just that purpose. Providing your subject is close enough, like with macro, you can turn on that lamp and then your autofocus can do its magic. That’s always my first choice. But if your flash doesn’t have that feature or if the subject’s too far away, then I’m guessing you have a torch with you, right?
So my technique when I’m using a torch is simply to:
Oh yeah, and one more thing: I use Manual Mode to make sure that I get the camera settings I want. Otherwise things I don’t want to happen, can sometimes happen. Like for example, the shutter staying open for ages in the dark.
Because chances are that the beam of light from your torch will be of a different colour temperature to the illumination from your flash. Your eyes might not notice that but your camera will, and it will record the torch beam as a splotch of coloured light. That can cause part of your image to be stained in the wrong tone.

Leaving a torch light on while taking this shot has left an ugly yellow stain across the lower part of this image, affecting the colour of this freshwater turtle’s neck.
I’ll give you an example. See the picture of the freshwater turtle here? Notice how its neck has been stained bright orange. That’s the very same turtle as the one in the photo at the top of this page and so I know those guys don’t have orange necks. Nope, that orange was caused by the beam of light from the torch shining in from the side. In fact, you can see that the torch is affecting the colour of the foreground grass too. In photography we have a term for that — we call it bad technique.
Okay, maybe you want to get that kind of colour into a shot for arty reasons. Well that’s fine, but only if it’s happening because you want it to.
Oh yeah, and that yellow-looking Cane Toad higher up in the page? That shot was taken with the torch turned off. Yep, the male Cane Toads really are a yellowish colour.
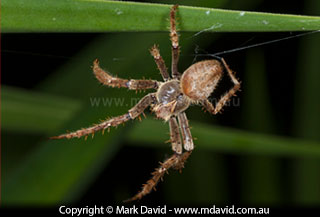
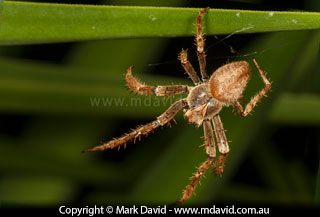
Both photos of this spider above were taken at night with a flash, but the first one was taken while my LED torch was still on. You can see how the bluish LED light has affected the colour of the spider. The photo on the right was taken with the LED turned off.
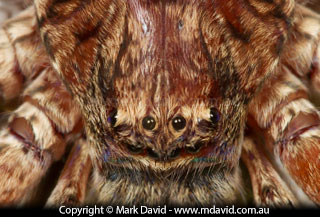
This Huntsman Spider provided some attractive close-up detail, even when working outside in the middle of the night. When I took another photo just after this one though, I discovered that the spider had moved somewhere else while my torch was off. Yep, thankfully I’ve been able to get over my fear of Huntsmans.
Yes, I’m sure you’ve already figured out the little problem with this method. That’s right — during the brief moment when your torch is turned off and you can’t see a damned thing, your subject might move.
On a few occasions I’ve been lying on the ground in the dark with my camera and my nose inches from a giant spider. I turn off my torch, take the shot and when I look at the preview of the image on my camera I realise I’ve photographed a patch of empty ground. That leads to some interesting speculation about where the spider moved to while the torch was off, and I can tell you right now: the bigger the spider the more interesting the speculation. So I would definitely not recommend this method for photographing creatures that are actually dangerous!
Copyright © Mark David. All rights reserved | Mark David on Google+


