
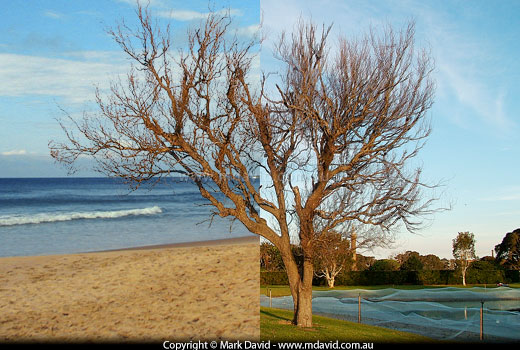
One tree, two backgrounds. To cut this tree out of its background manually would drive you nutty and take many boring hours.
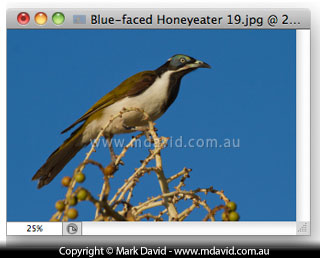
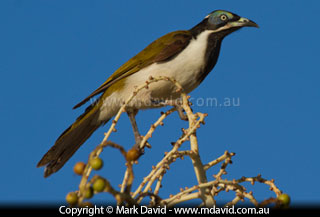
Imagine you want to cut this Blue-faced Honeyeater and the plant out of the blue sky background. Maybe someone is telling you it has to go onto a different kind of sky. This involves a process which is sometimes called masking or deep-etching, and doing it the way most people do their deep etches would take at least 20 minutes with an image like this one in high resolution. And it would be a boring job too — yep, let’s not forget boring.
Using channels, you can get it done in a couple of minutes.
Earlier versions of Photoshop had a tool called ‘Extract’ which was great at doing tasks like this. Then they removed it and put in a new system which uses the edge-select tool. I never really figured that new method out although I’m sure it’s a great method. Instead, I use other, much simpler ways. And when the shape is madly complicated I use the method described below.
It’s easier to learn if you understand how it works.
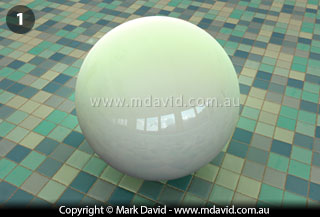
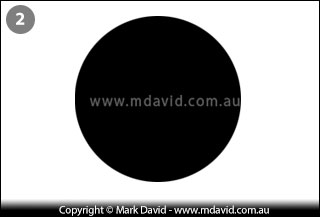
Imagine you wanted to deep-etch a ball like the one in the picture 1. In other words, you want to cut it out of its background. The ball is round, and so you’d make a round (ball-shaped) selection around it, like the silhouette in picture 2.
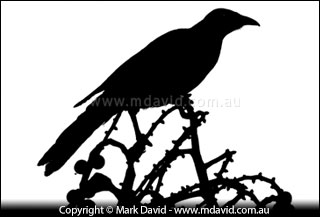
Likewise, if you want to deep-etch a bird on a complicated branch then you’d want to make a bird-on-a-complicated-branch-shaped selection.
The fastest way of making a shape that looks like that is to use the photo itself to draw that shape.
I’ve chosen a picture with a nice flat background because it makes this process easier to do. Which makes it easier to learn.
It’s got just enough detail to make the manual method of working look like a bit of a pain.
If you want, you can practise on the same file I used. I’ve made it available to download here.
No, really. They are. Most people avoid Photoshop’s extremely helpful channels. They see them as being a bit mysterious and kind of nerdy. And those same people spend all day at their computer deep-etching something like the tree photo above, whereas I get it done in 2 minutes and then get back outside chasing shots of waterskiing ducks. Who’s looking nerdy now?
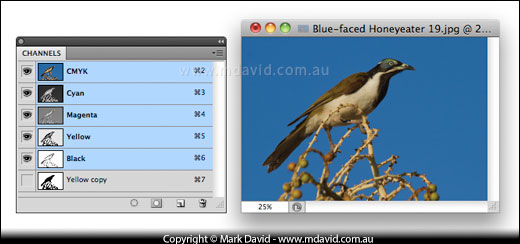
So with your image opened in Photoshop, go to the Channels palette.
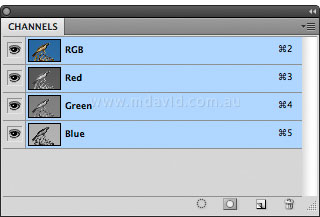
If the photo is an RGB picture like the one I’m using then you’ll see three channels. One for Red (R), one for Green (G) and one for Blue (B). And at the top of the palette you’ll notice an RGB channel, which is a combination of the three.
Click on one at a time and you’ll see how each of those channels look.
What you’re hunting for now is the channel that looks closest to a black-and-white version (a silhouette) to define the shape of the bird on the complicated branch.
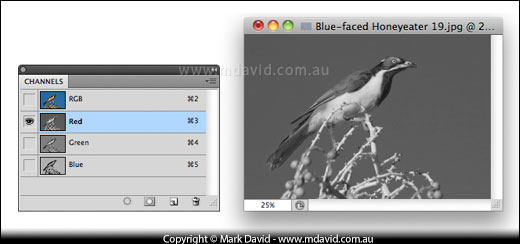
I’ve clicked on the Red channel. Doesn’t look enough like a silhouette to me.
The Green and Blue channels weren’t a whole lot better.
So the RGB channels were a bit of a disappointment in this case.
Normally one of those channels would have been pretty good. But you don’t have to limit yourself to just the R, G and B options.
If you convert your image to a CMYK document (go to the Image menu at the top of your screen and select Mode > CMYK Color), then you’ll see you’ve now got 4 channels: C, M, Y and K.
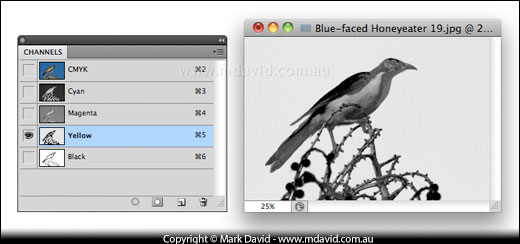
This time, you’ve got some much better options. I especially like the look of the Yellow channel in this example. Because if you squint your eyes a bit it almost likes the perfect silhouette already! So in this instance, you’ll be choosing your Yellow channel.
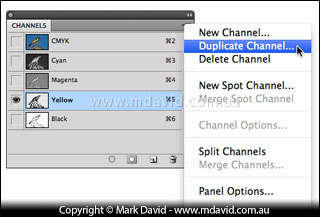
So because that’s the best channel for the job, you duplicate it. Click on the tiny down-arrow menu icon in the top-right corner of the palette and choose Duplicate Channel …
You can leave the name of the new channel as ‘Yellow copy’ and click ‘OK’.
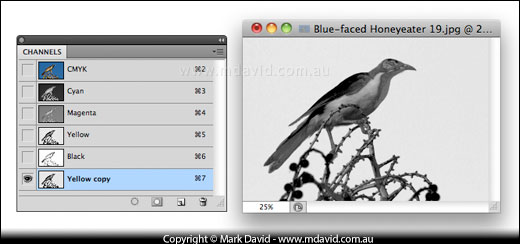
Woohoo! You’ve got a new channel called ‘Yellow copy’.
With ‘Yellow copy’ selected, we’re now going to change its appearance.
Go to the Image menu at the top of your screen and select Adjustments > Curves …
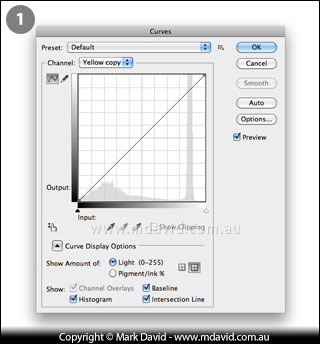
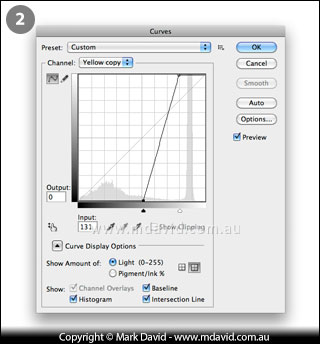
Picture 1 shows how the Curves palette looks when you start. Drag the top right of the line to the left until the background goes totally white. And drag the bottom of the line to the right until most of the bird goes totally black. Like how it is in Picture 2.
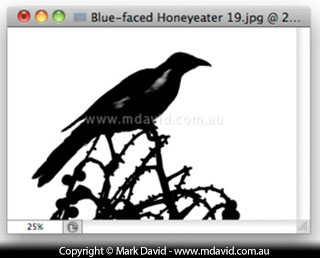
And shown here is how your duplicated channel is looking now. It’s almost a silhouette. You just need to manually paint in those few remaining grey bits on the bird using the brush tool.
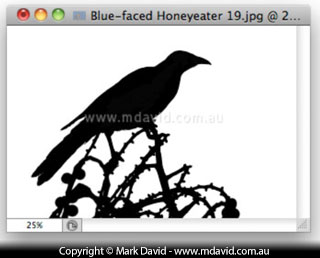
So select the Brush tool, load it with black, and paint in those last few blobs and speckles of grey until the whole shape is properly black.
You’ve got your silhouette. But how do you change that into a deep-etch? Well, that bit is easy now. Because channels make it easy.
First of all, in your Channels palette, click on CMYK to restore the image to full colour, like I did (above).
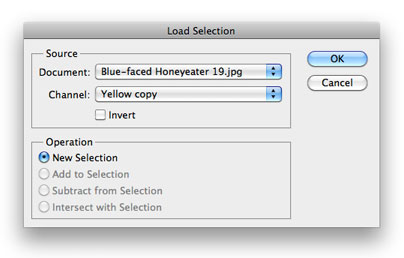
Then go to the Select menu at the top of your screen and choose Load Selection …
Make sure that the duplicated channel is the one chosen in the pop-up menu. In this case it is the one called ‘Yellow copy’. That was the one you did all that work on.
With ‘New selection’ chosen for the Operation, click ‘OK’.
You’ve now got a bunch of marching ants (a selection) around the bird and the complicated branch.
Or have you?
If you have a better look at your marching ants you’ll see that they’re actually tracing around the shapes of the blue-sky bits, instead of the bird-on-branch-bits. In other words, we’ve selected the inverse of what we want.

I could have avoided this by checking the ‘Invert’ option in the previous step but usually I forget. But no worries, when we get the reverse of what we want then we can simply reverse our selection by doing Command + Shift + I (or Control + Shift + I if you use a PC). Of if you prefer to use the menus it’s the Select menu at the top of the screen and choose Inverse.
Now we have our marching ants tracing around the bird and the branch.
Go to your layers palette and make sure that the Background layer is selected. Then do Command + J (Control + J if you use a PC). Or if you want to use the menus, go to the Layer menu at the top of the screen and choose New > Layer via Copy
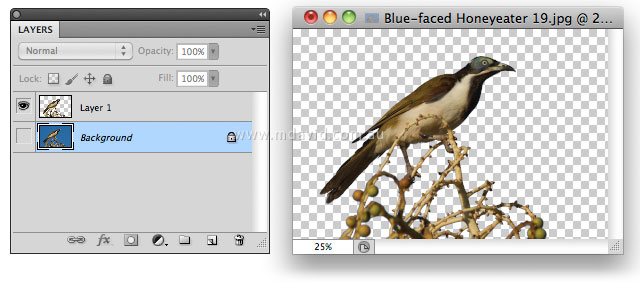
Done! If you go to your layers palette (above) and click on the little eye symbol next to the Background layer (to hide the background) you’ll see that the bird and its branch have been copied into their own layer.
Now you can drag a new background into a layer behind the bird.
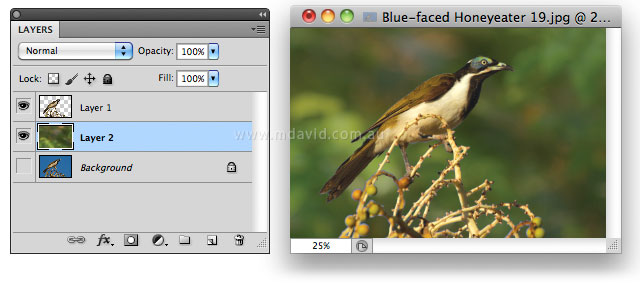
I’ve put in some out-of-focus foliage behind the bird but anything else can go in there.
You might want to now revert your photo back into RGB mode.


