You can’t do a realistic mouse unless you can do realistic fur. Cinema 4D has a module called Hair which lets you add all sorts of hairy detail to your models. Here are the steps involved.
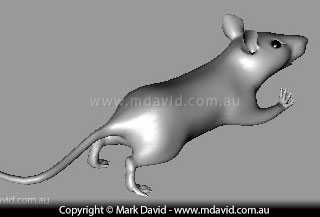
Here’s the little guy posed and ready for some fur.
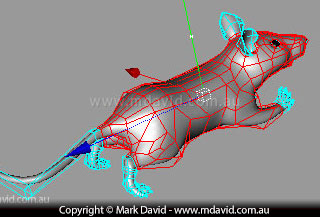
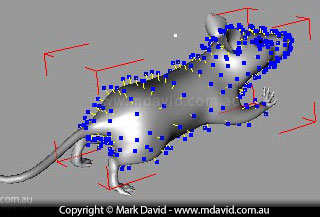
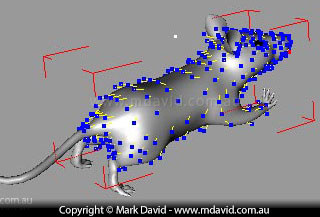
The model is made up of 4-sided shapes called polygons. The first step towards giving it fur is to figure out which polygons need fur and which ones don’t. In this image you’ll see I’ve selected the polygons that need some fur.
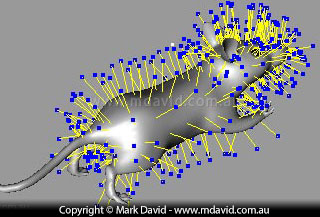
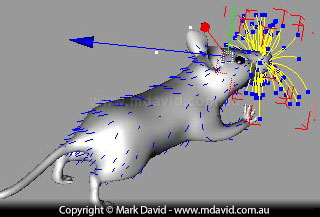
Here’s what the hair looks like when you apply it to the selected polygons. Although that’s not really hair yet. Those yellow lines with the blue dots are just guides to show where the hair will go. It looks wrong doesn’t it. For example it’s all the same length and standing straight out.

This is how the fur would look if you let the computer render with the guides set up in its default settings like in step 3. Which is why we almost never just leave things at their default settings. See how the fur adopts the basic geometry of the guides. That’s one weird hairy mouse. So it’s time to modify the fur.
It’s back to the hair guides. They’ve now been reduced to a length more suitable for a mouse. Notice that I’ve made the hair especially short around the nose. The hair is still standing straight out though.
I’ve now brushed the guides back to make the hair look like it’s not standing straight out.
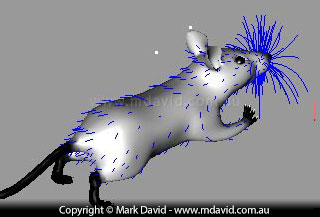
The mouse needs some whiskers, but the whiskers need to be made of thicker hair than the fur, so they are done with their own settings. Here you can see how the whiskers’ guides look after setting their length and brushing them.
The mouse fur should be less dense at the edges near the nose, feet and tail. In this mouse, the light areas allow full (dense) hair growth. Grey areas (like around the mouse’s wrists) will cause less hair to grow, and the black areas won’t let any hair to grow at all. Because that black, grey and white skin controls the hair density, it’s called a ‘density map’.
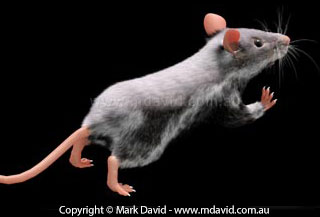
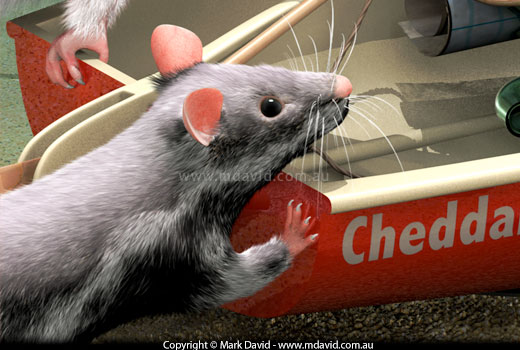
Now that the density, direction and length of the fur is set it’s time to let the computer do its thing. When you make the computer ‘render’ it produces a mouse like the one here, ready to drop into the scene.
Copyright © Mark David. All rights reserved | Mark David on Google+